


Jeff posted in the comments section that a tutorial in making foam hills might be of use. I'm not sure how informative this is likely to be, but it is a very simple procedure and allows you to bang out hills at a ferocious rate. No sticky backed plastic is required, but it can be introduced at any point during the process without ill effects.
Are we all sitting comfortably? Then lets begin.

To start with, you will need.
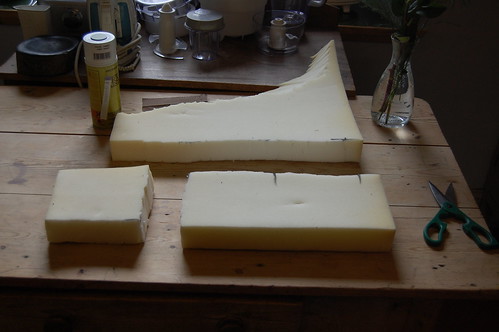
Some foam - I used 2 inch upholsterers foam which I bought for €6. I'd already hacked bits off it to make some other hills.
A Sharpie or other marker to mark out the shape of your hill.
A scissors - any sort will do. You can use a knife or a special tool to cut your foam, but I find a scissors offers more control and is just as good.
Spray paint - I used Army Painter Green undercoat as it was what I had to hand. This can cost me €12 in my local games shop. I much prefer paying the extra few shillings for GW/Army Builder products than using car body spray. GW/Army Builder products are a lot more pigment heavy and are a known quantity, while I can't always guarantee that I'll be able to get the same brand of car body spray. Tastes differ however.
One thing that does irk me about Army Builder sprays is that they don't label the cans, which means that you can have problems if caps get swapped or mislaid. I always mark my cans with a sticky label to prevent embarrassing accidents.
And lastly, a template. I wanted to make hills to fit my new mat and therefore used a piece of corduroy that I cut to represent a ploughed field as template. This is only really an issue if you want your hill to be a certain size or shape.

I've marked out my foam using my template. My play mat is marked off in six inch squares, so I've decided to make two hills, one single square hill and one double square hill. There's no need to be punctilious about this really as you'll be hacking the foam about anyway.

I've cut out the first hill using my scissors. As I did not have a grown up present to help me, several innocent bystanders were horribly maimed during the process.

A wargamers life is one of constant interruptions and distractions from the task at hand.
I somehow managed to soldier on.
I cut out the second hill. Due to my improved scissor handling skills, only one member of the public was slightly maimed in the making of this hill.
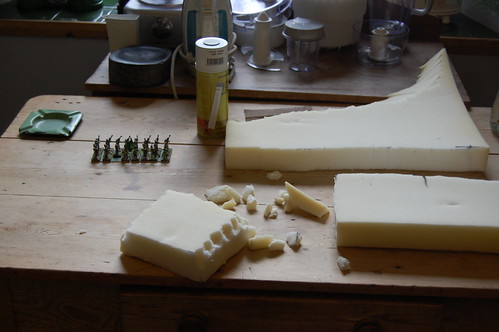
Shaping the foam. This is pretty simple. I want to keep as much of a flat surface as possible for figures to sit on, while making a slope. Simply cut along the edge of the foam with your scissors or if the Sun is over the yardarm and you're already on your third gin and tonic, you can use your fingers and tear bits off.
I usually tear bits off and then neaten things up with the scissors afterwards.
Keen eyed readers will notice some French sneaking on to the field.

However on closer inspection it appears that they are not Frenchmen at all, but the green clad lackeys of Bonaparte's Legion Irelandaise - vile canting dogs of Mayo men to a man (boo! hiss!).
After doing the basic shape of the slope with fingers, I've started shaping the right hand side with scissors. I wanted to keep as much of a flat surface as possible, so the slope is rather steeper than I would like. I think next time I'll get thinner one inch foam.

Another interruption - one of Mrs. Kinch's odder relatives calls to check if Mrs. Kinch Snr has a print of Prime Minister Thiers. I scurry upstairs to confirm it, pausing only to snap a picture of the death mask of the Corsican Ogre on the way down.

With both hills shaped, I march outside while it's still light to spray them. Jeff was concerned that the propellant in the paint would dissolve the foam. I can't speak for car body spray, but GW and Army Builder sprays certainly don't do anything untoward, except to the pocket book.
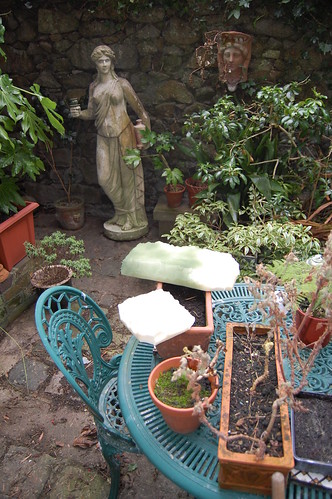
Start spraying - hold one end of the hill and spray at a distance of about twelve inches. You will not get an even coat and the result is a mottled effect that I think looks rather well.
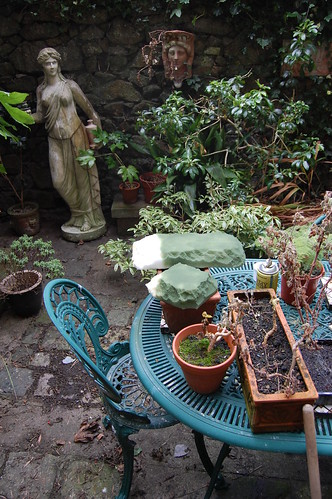
The hills are near completion; let the paint dry (this typically takes about five minutes) and finish off the unpainted part.
This is by sheer coincidence the amount of time it takes to mix a gin and tonic.
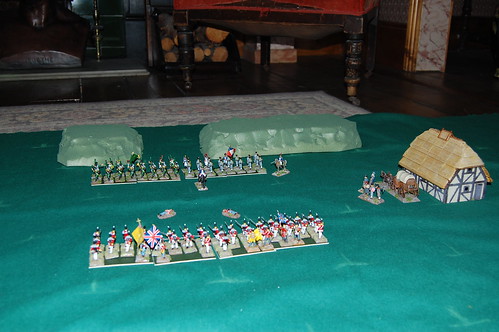
The Connaught Rangers and the King's Royal Halberdiers confront the Legione Irlandaise and the 8ieme Ligne somewhere in Chez Kinch. Note the very fetching hills in the background.
And there you have it.
Two serviceable hills in forty minutes including interruptions to fortify the inner man with bacon and cheese sandwiches, answer the telephone and mix a gin and tonic. Neither feature is ever likely to win any wargaming beauty pageants, but they are cheap, quick, practical and easy to store.
If you'd like the Blue Peter fact sheet that accompanies this tutorial, please leave your name, address and credit card details in the comments box below.
Thank you for the tutorial . . . but sadly I seem to have misplaced my checkbook and credit cards, so I'll have to wait until later to request more information.
ReplyDelete-- Jeff
Very hillish sort of hills - the kind of thing that says to a viewer: 'I am a hill.' Too often on wargames tables these days, one sees rises so barely perceptible as to fail to aspire even to speed bump status.
ReplyDeletePersonally, I remain sufficiently 'old school' as to prefer contoured (i.e. layered) hills. Much easier to write rules for, I find. For instance, if the contours are so close together as to prevent figures standing up on them, then the thing is too steep. As you can imagine, slopes that infantry can scale can prove an impassible barrier to horse and guns.
My 'layer' are half an inch thick. I rather think that double that thickness might have been an improvement - you want hills with altitude...
Cheers,
Ion (Archduke Piccolo)
Archduke Piccolo, maybe your hills are in need of an altitude adjustment... ;)
ReplyDeleteAnother benefit of these foam hills is you can use them for pillows if you're in need of a nap between battles... ha ha
I've tried several methods of building hills, the one which I like best so far is stacks of foam core ... one, the flat is already colored, and I leave the sides unpainted as the terrain around here is marked by frequent cliffs of exposed rock between levels anyway and I feel more at home.
ReplyDeleteHowever, I've also grabbed some paper salad bowl/plates and found them to be just great ... right height and actually strong enough in the brand I use (can't remember it, but recognize in in the store).
Also, I've taken those foam plastic sheets you can get in the flower section of home decorating departments, and cut them into really nice hills. I find that gluing some card to the bottom of the hill slows down the inevitable erosion and tectonic shattering (though not the gully gouging cat - a - strophe!).
:)
A
Good stuff, many thanks for the tutorial.
ReplyDeleteIn my case, I'd need to be careful over the juxtaposition of similar-looking materials and refreshments, as I suspect there'd be a risk of me absent-mindedly making myself a nice foam and pickle sandwich...
Steve Gill
I have a terrible habit of dipping my paint brushes in my coffee...
ReplyDeleteSo do I! The funny thing is, if you're useing old school enamels, you can lift it off with the judicious application of kitchen towel, but if it's PVA it just makes the coffe taste rather...er...vile!
ReplyDeleteAn amusing artical that forces me to link to you whether you like it or not! Don't feel you are required to reciprocate, mine is a very odd blog knee deep in TOY toys, and not much modelling...and no war-gaming!