Sunday, February 9, 2014

Inaugural Game - Quatre Bras - Part Two


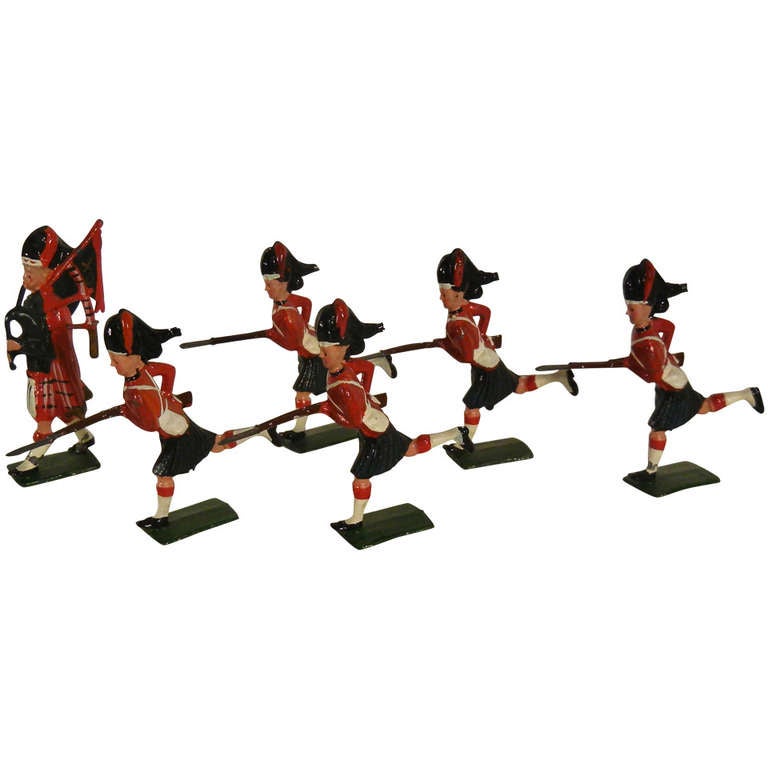
The Black Watch at Quatre Bras 
(can't quite make out the name of the artist)

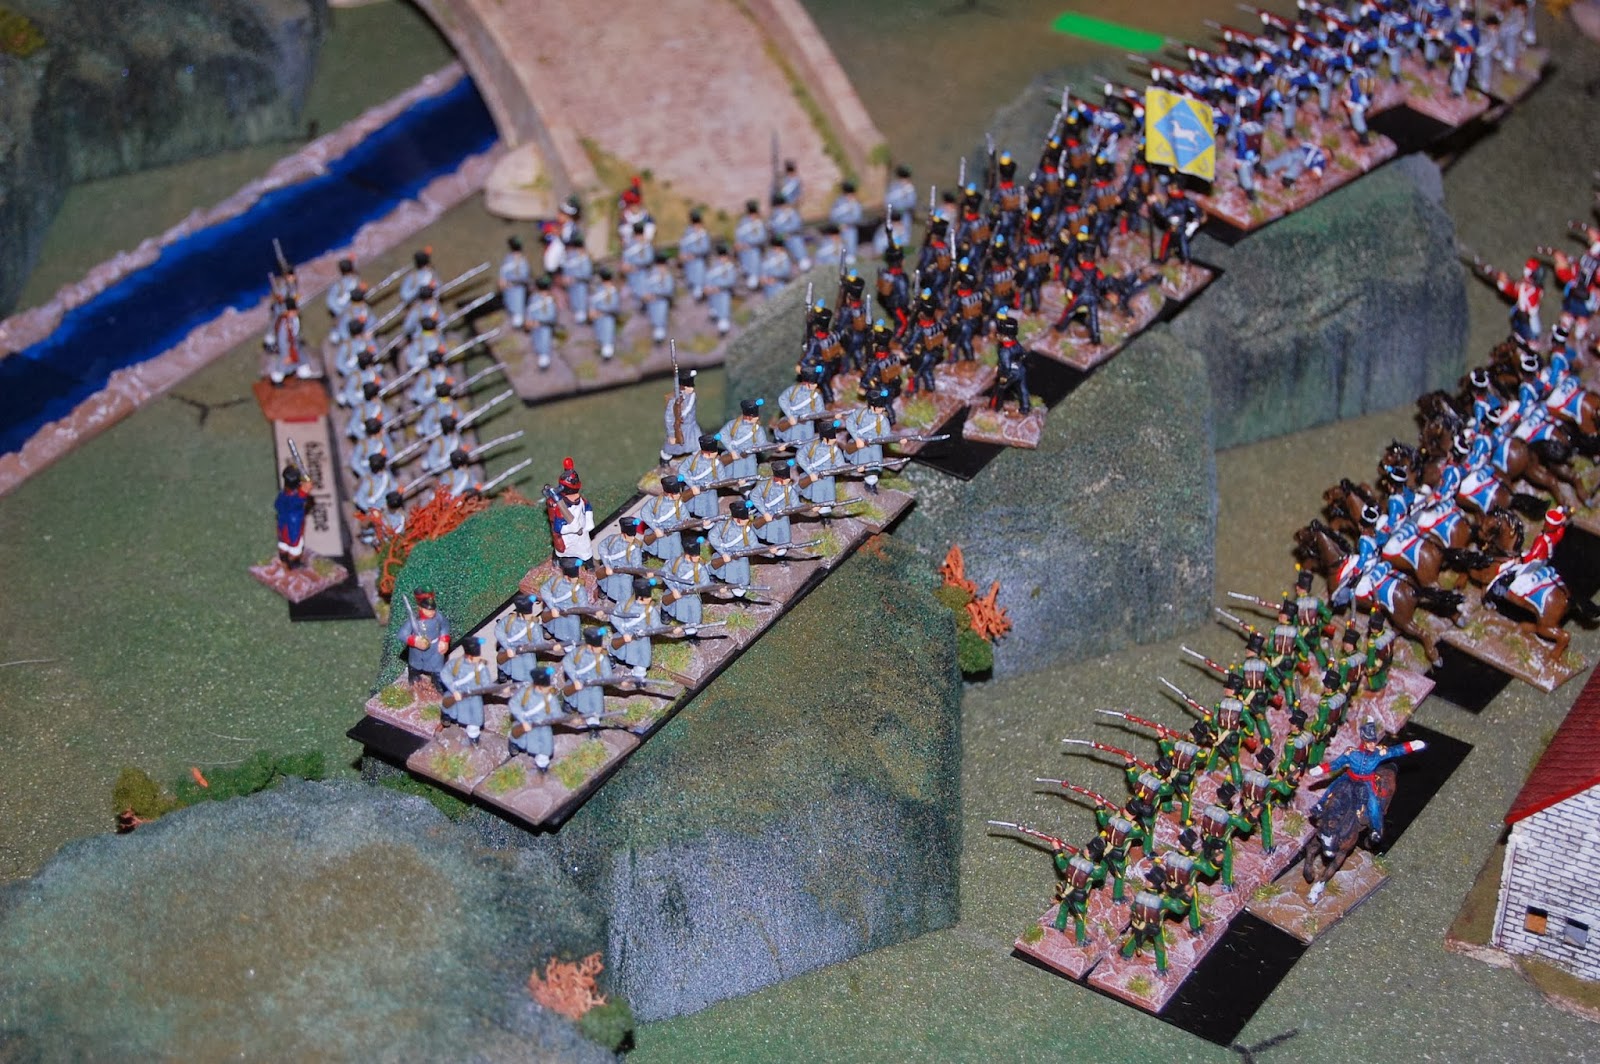
In the first half of this battle report, the French forces had moved very aggressively.  Donogh had with characteristic clarity targeted the Dutch-Belgian positions on the Allied right and had inflicted crippling casualties. The French managed to wipe out four Allied units with no return, had managed to replenish their line with fresh units and withdraw that had been cut up in the initial assault.  

After scoring four of the nine points required to win the game on the French left, Donogh handed over to Capability Savage who launched a predictably dangerous assault in the centre. This inflicted another two casualties, but the French lost as many in return. The Allies have managed to move their powerful British Guards on their right and appear to be about to swing the battle in the centre, but with a score line that is reading 6 - 2, they will need to be both lucky and good to pull off a victory. 


Supported by Brunswicker Hussars, the Dutch light cavalry counter charge the French line in the ridge 


But fail to make an impact and are driven off by the French infantry in line.


After clearing the woods of Allied troops, Donogh had wisely withdrawn his weakened units. Mr. Target and General Creanor decide that it's time to knock off some of those wavering troops. 


General Creanor is skeptical, but Mr. Target is adamant that they need to start hitting back


Meanwhile on the French right,  another column advances under General Bechelu only to be shattered by a blast of grape from the Dutch guns


"Right, well that didn't quite go according to plan..."


"...but I am assured that we will triumph in the centre."

"Isn't that right McCarthy?"

"Why of course Emperor, I have every confidence in eventual victory. You have assured me of eventual victory. What could possibly go wrong? "


"You're not a hopeful man, are you McCarthy?
"No Sir."
"That Dutch artillery officer, I like his fancy hat. Go get me his hat, McCarthy."


General Eager decides to make an appearance. The Allies pause to take stock. 


General Berthelu takes the Dutch guns at the point of the bayonet. Capitaine McCarthy (no relation) is dispatched to the rear with the commanders hat as requested. 


"It's a very nice hat, McCarthy. Thank you."
"You're welcome, Sir." 


Unfortunately for the 45ieme Ligne, the Fourth Foot and the Black Horde of Brunswicker Hussars clear them off the heights and send them streaming utterly broken to the rear. 


However, the situation is looking black for the Allies. The ill advised advance of the British Grenadiers on the British right had ended in disaster. They have inflicted casualties, but nowhere near enough. 


"You see General Creanor, The Lord tells me he can get me out of this..."


"Really, Sir? I thought you had a rousing speech that was going to inspire the men?" 


"Actually....no."


Unfortunately for the Allies, the French cavalry, who have been swinging the lead for the game so far advance and force the 4th Foot into square. The Second Battalion of the 8ieme Ligne move forward and give them a volley in square, breaking them and sending them streaming to the rear. This defeat cracks the Allied resolve and the Allied army begins to retreat.  


Well done gentlemen. 
(Mr. E in characteristically "hiding out of the way of the camera" pose) 

It was a good tight game, the French seemed to have all their own way at first and then things began to unravel in the centre.  I think Mr. Target (a CCN newcomer) and General Creanor made the best of a bad situation, but were ultimately undone by Donogh's decisive strike in the early game.  This allowed the French to put the Allies on the back foot and they were never really able to cut down that lead. 

A fitting christening of the War Room and one I was delighted to host - the first of many I hope. A good game, good company and good red wine. At least I found it so, Benedicamus Domino*. 


*With grovelling apologies to Hilaire Belloc.

Saturday, February 8, 2014

Inaugural Game - Quatre Bras - Part One


The Battle of Quatre Bras by Woolen

After a lot of tooing and froing, I finally managed to get the War Room up and running. I had promised my good friend General Creanor that he would take part in the inaugural game, during which we would open an extremely fine bottle of 1984 port that he gave me when we first got our house. Now as it happens I also happen to have a unit of Hinton Hunt Imperial Guardsmen that I bought as part of a consortium with Old John.  These figures were part of the collection of a man who enjoyed playing with figures, but who never actually played with them.  I intend to use these figures as the Old Guard at Waterloo, which will be their baptism of fire after nearly forty years on the sidelines. 

However, I forgot that we hadn't played Qautre Bras and it seemed rude to play Waterloo without first playing Quatre Bras. The intention was to play both in an evening, but we didn't manage to get around to it. But we drank General Creanors excellent port and played a game with good friends. 

The Old Guard can stay in their box for a few weeks more and we'll get another game.  I think there may be another bottle of port somewhere. 


Command & Colours: Quatre Bras map courtesy of ccnapoleonics.net/

For those of you unfamiliar with the Hundred Days campaign, you will find something more to your liking here

The briefing that comes with the scenario is as follows. 

Napoleon Bonaparte’s surprise march placed his army squarely between Blucher’s Prussians at Ligny and Wellington’s Anglo-Allied army assembling around Brussels. Napoleon concentrated most of his strength against Blucher, but ordered Ney and the II Corps to capture the vital crossroads of Quatre Bras to deny Wellington the chance to reinforce Blucher. Ney procrastinated and his attack did not get underway until two in the afternoon. The delay allowed Wellington to bring fresh allied troops to support the Dutch-Belgians and the Nassau Brigade that were thinly deployed south of the crossroads. The initial French advance was greeted with musket volleys, but the outnumbered Allied troops were forced back. The Allied units in the wood, however, managed to hold. Facing three infantry divisions and a cavalry brigade, the Allied situation was fast becoming desperate, but additional troops kept arriving and Wellington, now in command, directed them to key positions on the battlefield. Ney realized that the numerical balance was shifting in favor of the Anglo-Allies and that he could only capture and hold Quatre Bras by a desperate move. He ordered General Kellermann to lead his cuirassier brigades forward and break through Wellington’s line. The cuirassiers managed to reach the crossroads, but were driven back by close range artillery and musket fire. The arrival of the British Guards Division late in the day gave Wellington sufficient strength to launch a counter-attack that forced the French to give up all of their hard fought territorial gains.

The stage is set. The battle lines are drawn and you are in command. Can you change history?


Donogh in characteristically agressive form attacks the Dutch-Belgian troops in the woods on the French left. 


General Creanor searches in his hand for inspiration. 


While Donogh seeks inspiration elsewhere


"Excellent" says Donogh. 


The gift of General Creanor - unfortunately, I didn't decant it which meant that the later glasses were somewhat cloudy


French lights and the 8iem Ligne hit the Dutch militia with predictable results


The French left clears the woods of Allied troops, but the British Guards are moving into position.


At this juncture, Capability Savage arrives and takes over command in the centre. 


"Bayonet Charge, read it and weep."


The French line before it rushes forward. 


French columns crashing into the Allied centre. 


We'll soon shift 'em off the ridge


"That chap, that chap right there - he offends me. Those trousers with that hat? The man is a monster." 
Mr. Target arrives to assist General Creanor.


The French advance starts to shatter the Allied line. 

Hitting the Brunswickers in the centre

And driving back the Nassauers on the right. 


The Dutch manage to hang on the Allied right, but it's looking distinctly grim for the Allies. 


The cork of General Creanors gift, just before I managed to cork it...

I really, really should have decanted it. 


The Highlanders manage to retake the ridge and wipe out one of the advancing French columsn


The second battalion of British move up - these are Strelets Crimean Highlanders standing in for the chaps you saw at the beginning of this post (That's the Black Watch for those at the back. Yes, you Gow. Wake up and sit up straight boy. Wake Cordery up while you're at it. He's day dreaming.).  Rated as British Grenadier Guards in Command & Colours Napoleonics, they are a very powerful unit. 

And so with that image of the Black Watch charging into battle...

...or possibly this image of the Black Watch charging into battle. 

We shall draw Part One to a close. 

Friday, February 7, 2014

Messing with the workings of the Mechanical Turk.


I quite enjoy a game of Memoir '44 online. It's no substitute for a proper wargame with toy soldiers and such, but it is always there and that's no bad thing.

One thing that I hadn't noticed though was that the scenario editor allows you to make your own maps, and upload them to the website. Not everything in the editor can be added, the online game, which seems a bit orphaned to be honest, hasn't implemented a lot of the new whizz bangs like mortars, machine guns and other good stuff.

Now I've had some success using Memoir '44 Online as a mechanical turk, setting up the game with my figures and then using the AI to provide an opponent. Of course, I'm limited by the scenarios that come with the game.

However, I have discovered the Scenario Editor not only allows you to make your own maps, but also allows you to play those maps both online and using the games AI. Now as I said, the online game lacks a lot of the features of the board game, but even with that limited ability there are some intriguing possibilities for solo play.


Wednesday, February 5, 2014

Art of Tactic Napoleonic

The only image I can find relating to Art of Tactic Napoleonic


I've been regarding Zvesda's recent output with a great deal of interest. They are the Rolls Royce of 1/72 plastics in my opinion and they have never failed to produce good stuff. I've been disappointed by their decision in recent years to shift away from big boxs of toy soldiers to smaller boxes aimed at the board game market, but you can't blame a fellow for making a living. 

Their Art of Tactic stable of games covers Samurai Warfare, the Second World War and a hypothetical World War Three. But what has really sparked my interest is the news that they will be releasing a Napoleonic version. I don't think I'll be changing games anytime soon, but Zvesda will be releasing figures for this game in their Art of Tactic boxes. These are small, containing at most half a dozen figures and cost about 2.95, but they are lovely. 

I imagine they will be working on the 1812 campaign with a view to the domestic Russian market, but I wouldn't mind paying over the odds for a few specialist figures particularly if they were of the gem like beauty that characterises most Zvesda releases. 

I'd certainly be interested in some Zvesda produced Russian horse artillery, but at present (stolen from plastic soldier review.com), the releases will be as follows. 

Art of Tactic Napoleonic 
  • 6808 - Russian Line Infantry
  • 6809 - French Foot Artillery
  • 6810 - Russian Foot Artillery
  • 6811 - Russian Dragoons
  • 6812 - French Dragoons
  • 6815 - Russian Infantry Command
  • 6816 - French Infantry Command
  • 6817 - Russian Dragoons Command
  • 6818 - French Dragoons Command

A Very British Civil War Truck


I've been toying with doing some Very British Civil War scenarios for a while now. They seemed to be a perfect fit for Memoir '44. I could use my 20mm partisans and British infantry for another conflict and be unconstrained by the need for particular marks of tanks or other things. 

With that in mind, I picked up some Frontline resin stuff and played with it a little. 


This is an armoured truck from Frontline's resin England Invaded Home Guard range. 


Which inevitably brings this to mind.  I saw quite a bit of Dad's Army when I was small and I'm ashamed to say, had a long argument with Donogh over whether the early episodes were in black and white. It later became clear that what had happened was that when I had first started watching the shop, we had a black and white television which we later upgraded to colour.  

Well, I lost that argument. 


I painted this as generically as I could so that it can serve any master and may possible end up being used by the Home Guard in Sea Lion games at some point. The body was sprayed grey because that was what I had, the coach work painted Vallejo Russian green with some highlighting. I suspect it will be transporting British Union of Fascists troops for the time being. I tried a little line highlighting with pure white which looked very odd up close, but actually makes the detail pop in a very pleasing fashion at three feet. 


I added a registration plate on a whim, though it occurred to me afterwards that a yellow reg may not be appropriate. 


Saturday, February 1, 2014

Airfix Harrier GR.3


NEEEEEE-oowwwww!!!! 


Proving that I am actually incapable of thinking in a straight line - after I got home from work this morning I put these together.  I often have difficulty going straight to bed after a night shift and I find that doing something with my hands is the perfect antidote.  I found these while I was looking for something else in the War Room.  The side of the box side "One flying hour", so I thought I might at least make a start. 


A brace of birds
(and some basing going on behind) 

These were a gift from Mrs. Kinch a few Christmases ago, as I was going to use them for the "Hunting the Harriers" scenario in the Force on Force supplement "Cold War gone Hot". Now as it happens I have another plan for these, which meant that they needed to be assembled in their flight configuration.  As wargaming models, I've also done away with the internal detail and the pilot as I reckoned I would almost certainly make a hash of the canopy and end up painting it blue or silver. 


I am pleasantly astonished at how well this turned out. 

The kits actually went together quite quickly and cleanly despite my cack handedness. There were a few pieces that needed trimming and there was quite a bit of flash in parts, but mostly the fit wasn't too bad. 


The belly of the Harrier. 

Both of these planes were assembled in the wheels up configuration, so that I can eventually attach them to flight stands. A little bit of filling will be required. I plan to give these a quick blast of GW white spray and then mark out the camouflage with a pencil as instructed by no less a personage then Alfront. 

 There is of course the question of weaponry. I've heard tell of using magnets to allow different loadouts to be added to model planes. That might be something I look at, though I'll really need to get flying bases and probably paintwork sorted first. 


A galaxy of grim aerial doom. 
Left to right. 
( Two expensive bomb thingies, Slightly more expensive bomb thingies, Rocket Pod or possibly 20mm cannon whatsits, Very expensive bomb thingies. (rear) Whacking great big bomb or missile, though I don't see any sort of motor. )    

I'm not really au fait with aerial weaponry, what little I know about war in the Air was gleaned from a youthful interest in Biggles and that didn't really cover anything after 1918.  Most of the time, I'm hard pressed to tell the difference between a charleville and a brown bess. I note that unlike the Harriers in Battle comic (or was it Warlord?) this kit doesn't sport a laser.  I can't find any reference to that comic strip online, perhaps I dreamed it.

On the whole, not a bad output for just over an hours work.